 Have you ever wanted to just have a question pop up in a Word document when someone opens the document to update it? There are hundreds of reasons that you might want that to happen. So here is a tip on how to do that using the [Fill-in Code].
The fill-in Field code
The fill-in Field Code allows a user to create a template that, when used to create a new document will prompt the author to fill in certain information. It allows you to pose a question and give information to help the person fill in that information.
It is one of the many field codes that are in Word for you to utilise. You may like to read my previous tip on field codes in general too.
Inserting the Fill-in Field code
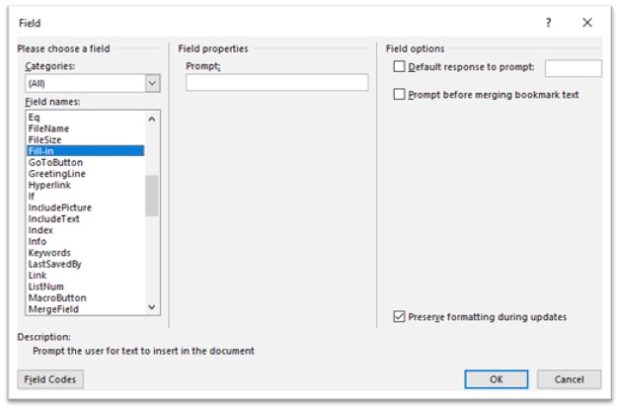
- Select the [Field…. Tool] in Quick Parts from the Text section in the Insert tab.


The Field dialog box appears.
- Scroll down to Fill-in in the Categories area on the left.

- In the Prompt area in the centre of this dialog box, type in the question or the explanation you wish to appear to the user.
- Select the [OK] Button.

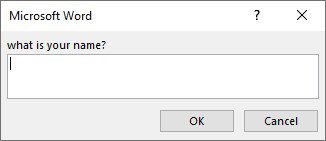
This window appears.
- Select the [OK] Button.
Please do not type anything in the box before you select the OK button as this will be in the window when the user uses the document.
Here is an example document for enrolling an exercise class at work. 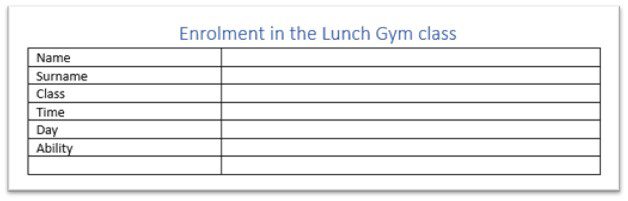
Yes it’s simple and you can work out what to put in the second column. But would it not be more welcoming to see this instead. 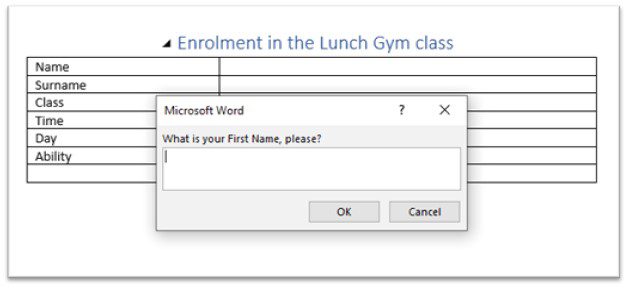
I feel that this field code lends itself best to being used in a Template. I will create a template for an Employee of the Month letter. This will also have the automatic date, another piece of information you won’t have to fill in each month.

How to set up a fill-in field code
I created the template using what I needed. Then I selected the Fill-in field code to appear below the Congratulations introduction. Here I typed the prompt as “the employee’s name, please.”
Saving the document as a template allows me to use it over and over again and only having to type in the employee’s name for each instance. Should the amount go up I can easily change the template and all future letters will be the same.
As you can see from the image, there is no name as yet. Whereas the date will be the current month every time I use this template.
- Save and close the template and create a new document using [File, New, Personal templates and the template of your making].
As soon as I do that this is what I am presented with before the document appears. 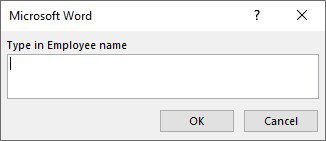
- Type the name.
- Select the OK button.
And here is the result. 


