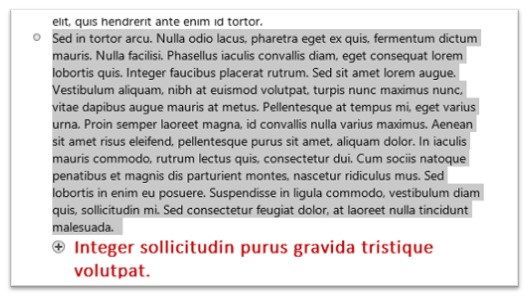
Outline in Word means seeing just the headings of a long document. That is if you are using styles which makes this all possible. You still have the paragraphs that are part of each heading but you have hidden them for the time being. This allows you to concentrate on the flow of the document more easily. If you need to move a heading, and its paragraphs, to another place this makes life a lot easier. When you first see Outline View it looks a bit unwelcoming until you know of its magic.
How to create an outline document.
As with all things Word, you can apply a style to text as you are typing or apply it later when you have finished the document. Having the correct levels applied to each heading is important. Here are two examples of a document without headings and then with headings.
I have purposely used colour to accentuate the difference in levels of my headings.
Having applied the different heading styles to each heading the next step is to see this document in the Outline View.
In the View Tab at the beginning you will see all 5 view choices. Select the Outline View.

This image indicates that this heading with all its paragraphs underneath can be collapsed so that you only see the heading.
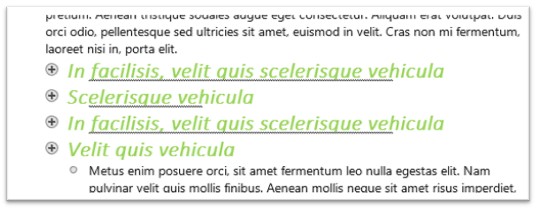
How to collapse and expand one heading.
- Move your mouse to the plus image next to the heading.
- Double click on the Plus. This will result in a collapse.
- Double click again and this will result in expanding the paragraphs.
The other image you can see is this. If you click on it once it will highlight the one paragraph.
How to collapse and expand all the headings.
If all you need to see are just the headings themselves from the new Outline Tab which appears uncharacteristically near to the front of the tabs not at the end. Select the Show Levels Tool. From the list that appears you can select which levels you would like to see. Sometimes it is quicker to select the last level just in case you have used more levels than you thought you had. Word will not show levels you have not used.
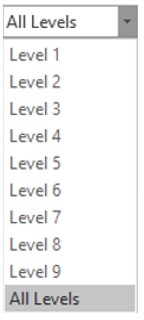

As you can see in my example I have three levels only.
Now I shall choose to see Level 2. 
I can now move the headings around.
How to move a heading and its paragraphs.
- Click once on the Plus sign at the beginning of a heading. This highlights all the contents that belongs with this heading.
Hold down the left mouse button and drag to the position you require. 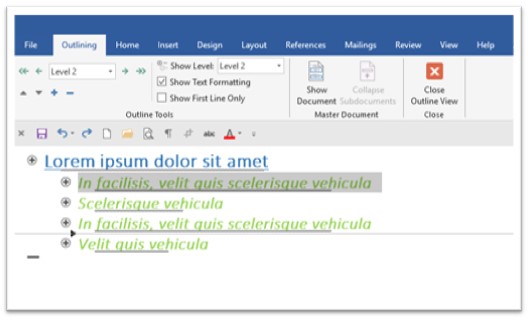
Let go of the mouse and this is what you will see. 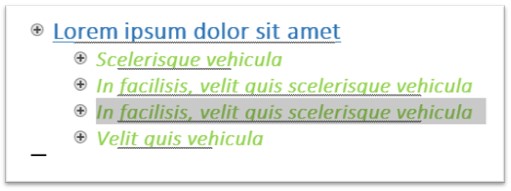
- Select All levels from the Show Level list.


