I have been constantly astounded that students still do not know that it can be so very easy to create a table of contents for their dissertations. Not only that but they can also be very accurate to the last correction and change of text placement. With the use of Styles a Table of Contents is created and updated in moments.
I wrote about styles a while back. How to use Styles in Word 2016. In this article, I showed you how to use the Styles Microsoft have created for you. In Creating your own styles in Word 2016 I showed you how to create and modify styles and then how to apply them to your work. Now I will show you how to create a simple Table of Contents using those styles.
You first need to write your dissertation and apply the styles you require to headings throughout the work. If you have created your own styles with their distinctive names not the Microsoft ‘Heading 1 through to 9’, then it will make your life a little more complicated but this can still be managed.
You probably have a good number of pages and even more headings running through your piece. Make sure that each heading is tagged with the right style. Additionally make sure you have not accidentally tagged a paragraph as a style as this will show up in your table of contents too!
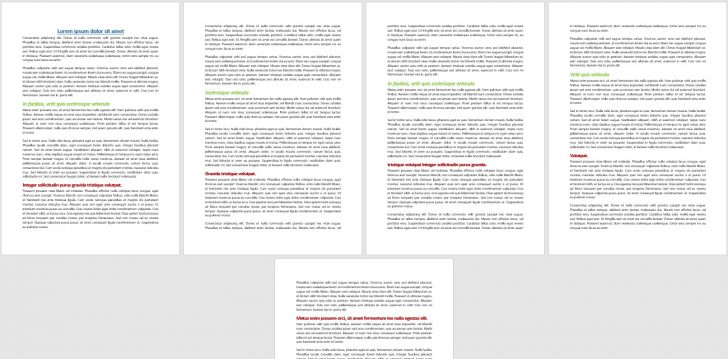
Here is an example of a longish document. You can clearly see that there are just three styles for the headings. I have created them to show up easily for this exercise. Blue Green and red.
There are only 5 pages to this document so a Table of Contents really isn’t all that important but this is an exercise in creating one.
Once you have tagged all the headings to your requirements. Place your cursor where you’d like the Table of Contents to appear. I would say it is usually placed at the beginning of the document even before the first heading.
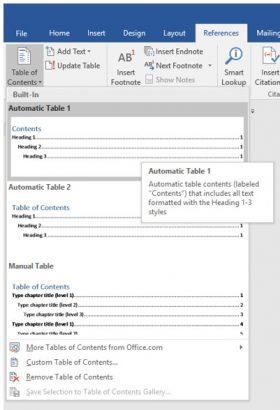
From the Reference Tab select the Table of Contents tool which resides at the very beginning of the Ribbon.
When you select this tool a list appears beneath it. Select the style of table you like. The easiest and quickest are the automatic ones.
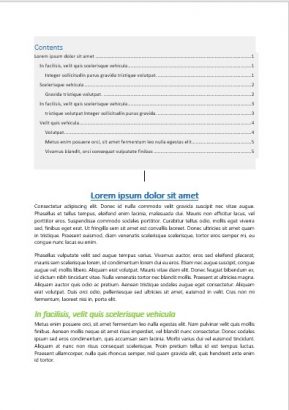
As soon as you select one of these styles a Table of Contents is created right where your cursor was. It displays the text that was tagged in each style and references the page that it is located on.
Updating the Table of Contents
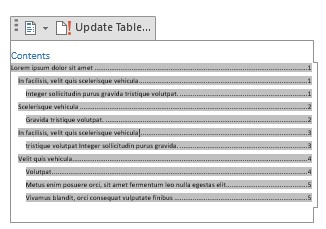
If you make any changes to your document such as moving a paragraph to a different page, you need to update the table. To do this click once on the table and you will see that there is a light grey background to it.
There is also an update Table… tool.
Select it and your table is automatically updated and correct.
If you want to delve further into this subject, you can modify the way the table of contents is formatted by modifying the ToC styles. Refer back to my article on how to create your own style. Have fun and never have a table take you to the wrong page again.


