Some fields could hold hold inconsistent data such as information might be in the wrong column or even totally incorrect, especially when it comes to dates or numbers.
This is quite common place. We are after all just human and human error is common. For instance, dates. This one of my pet hates. Many years ago, the fashion was to write dates with full stops in-between the day, month and year. This is not a good thing to have in a spreadsheet. Formatting can change how Excel treats a cell with a number in it.
If you require Excel to treat the number as a date then you need to input and format it accordingly. Simply typing the numbers with a full stop between will result in Excel treating this as simple text which looks like numbers and resembles a date but Excel will not be able to use it as such to either calculate how many days there are between two dates or sort in as list.
Therefore, you need the person who is inputting the data to input in the correct way. Giving them a list to choose from is one thing you can do or giving them messages on where they went wrong before they go onto the next item. This is called Validation.
Validation Rules are very simple to implement and can save you and others hours of untangling the mess that incorrect data could cause.
Setting up validations rules
Start by selecting the particular cells or area you wish a new validation rule apply to.
From the Data tab select the Data Validation Tool.
Data Validation is the first in the list that appears.
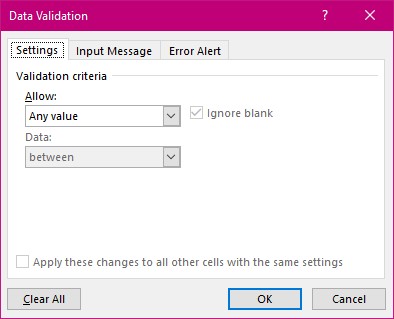
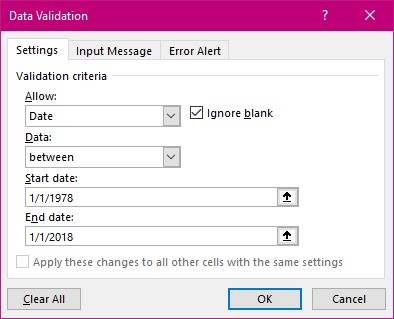
This dialog box appears next. There are three tabs which we will work through.
Settings Tab
This is where you set your criteria for the data to be input into the cells.
What will you allow?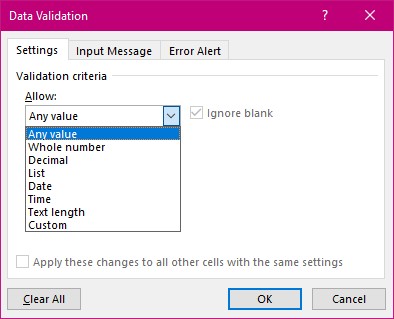
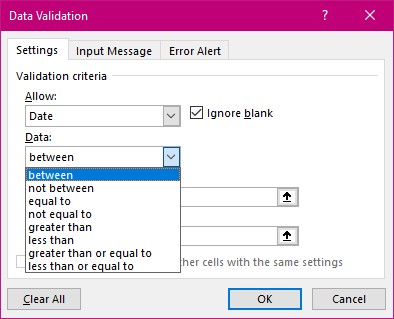
We are going to choose date as this is what I started with. If you need a list to choose from then read my tip on validation lists in Excel.
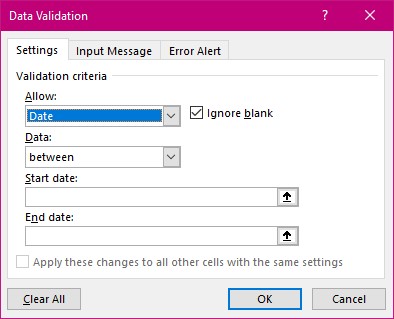
The data can be:
I am going to choose between two dates.
Input Message Tab
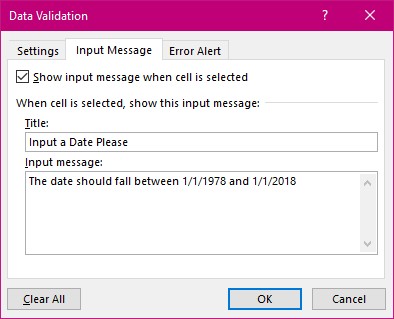
Now go onto the second tab named Input Message.
This is a courteous way of informing the person filling in the cell to enter the correct data. So be polite but explain fully in a simple way so as not to be misunderstood.
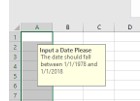
This is what your input message would look like.
The Error Alert Tab
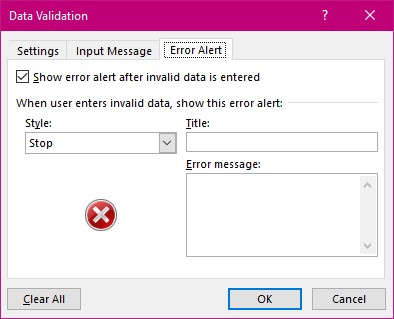
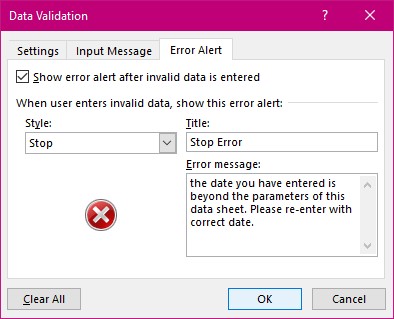
The default setting is to stop the person from going onto the next item with this error message. Once again be polite but explain what might have gone wrong and how to correct it.
There are three styles to choose from which have varying effects.
Stop:- stops the process from continuing and makes them try again.
Warning: – if you have input the data beyond the parameters then you are presented with three choices.
Yes = means you can keep the wrong data and continue with the next item.
No = allows you to edit the data to be correct.
Cancel = re-input the correct data from scratch.
Information:- Allows the person inputting the data to use out of parameter data.
Just think of how many times you have received a spreadsheet with incorrect data and had to re-enter it yourself. Or worse, how many times there have been errors in the data and no one has noticed until too late! You now have no excuse.


