
 Microsoft Office has had the ability to create quick parts in each of the applications within the suite. These can be paragraphs, images or diagrams that you need on a frequent or not so frequent basis but they have to be identical each time. I wrote a tip for this to use in MS Word a while back, so those of you who have read that one will see that this is very similar.
Start point
Start by creating the item you need to use. I answer emails that I receive that are not meant for me like this. 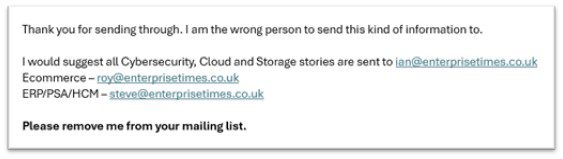
- Select the paragraphs.
- From the Insert tab select the [Quick parts tool].

At the bottom of the list that appears, you have two choices. 
[Auto Text] allows you to quickly access paragraphs such as the one we just made. 
[Save Selection to Quick Part Gallery…] is the same sort of thing but allows you to name and place the item in a specific area. 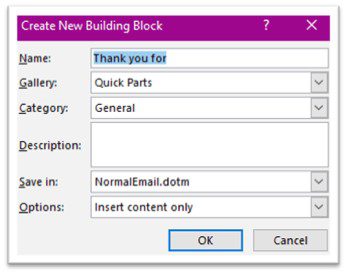
The gallery has many sections: 
- Select the most suitable for the item you are saving.
Using your Quick part
Once you have saved the items in question, to retrieve and use them is simple.
Auto text entries
- At the point in your email where you need the item select the Quick Parts tool.
- Select Auto Text at the bottom of the list.
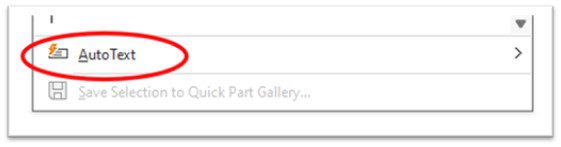
- From the drop-down list that appears select your item.
It is placed in the email.
Create a Quick Part
I am going to create our logo as a quick part. This has already been placed into an email as an image.
- Select the logo.
- Select the [Quick Part Tool].
- Select [Save Selection to Quick Part Gallery….].
- Type in the name for this item.
- Select the appropriate Galley
- Select and create a new Category if required.
- Type in a description of the item.
The entries will look like these. 
- Select the [OK Button]
Your entry has been saved.
Use the Quick Part Entry
- At the point in your email where you need a quick part entry, select the tool.
- If you have several entries you may need to scroll down the list to locate the correct category.

- Select the item and it is placed into your email.
The Quick way now you know what it does
There are always quick ways to do stuff in Microsoft products. Knowing what it is and how to use it first is always beneficial. Then being able to use two keys to activate the item is even better.
When you name an entry use easy to remember and applicable names, do not complicate it with lots of words. For the next step it makes that part crucial.
- At the point of needing an item such as the logo, type the name of the entry e.g. “logo” and press the [F3 Key].
Voila!
I told you that it was easy, quick and good.
So now you know all this, you can make you life a lot easier and create emails quicker, thus giving you time to drink that coffee that hopefully will not be so cold now.