 When you create a word document the default settings for a paragraph are to have a left aligning paragraph and no indentation for the second and subsequent lines within that paragraph.
I feel for people who are just presented with an application and expected to be able to learn all its little ways just because its been around for over 25 years as Word has. Yes, children use it in school but are not taught every aspect. Students come to University not all knowing how to create a document with multiple levels of numbering or that you can have a table of contents created by Word itself. In the same way some people do not know that indentation is there and can be easily applied and changed.
Setting indentation marks
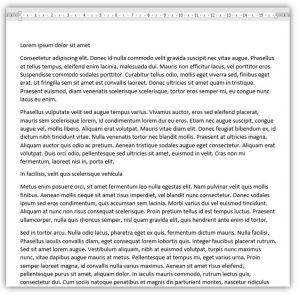
Let’s have a look at this document I’m writing now. the way to see if there is any indentation set is to look at the Ruler above the top of the sheet. If you do not have one then you need to set it on by going to the View tab.

The third section in this tab is ‘Show’ and the first item is ‘Ruler’. Click in the box to set the ruler to be visible.

The grey area of the ruler shows how much margin space you have and is usually the same width on the right-hand side too. the white area shows how much space horizontally you have to write in. The numbering starts at the point where the grey and white area meet.
At Zero you can see this images which is made up of three separate items.![]()
If you carefully and slowly move your mouse pointer across these, tips show as to what they are.
The arrow that points down is First Line Indent. It means that only the first line of the paragraph will be indented. Or outdented, if that is what you require.
The arrow that points up is called a Hanging Indent which means that the second and subsequent lines in the paragraph will be either indented further or, again, outdented if that is what you require.
The Box under the up arrow is the Left indent. This travels with the hanging indent arrow and if you choose it and drag it to a new position it takes both settings, first line indent and hanging indent and keeps them the distance you set apart as you travel left or right along the ruler.
You also have a right aligning setting at the end of the ruler so that you can indent the right hand side of your paragraph.
How to use the indentation Arrows.
- Click in the paragraph you wish to change. Or select all the paragraphs that need to be the same.
- Carefully move the mouse to the arrow or box you require and drag along the ruller to the desired setting.
- Let go of the mouse and the arrow/arrows stay in that position and the paragraph is indented.
Changing indentation, the mathematical way
The mouse can be very tricky sometimes and you could end up moving the wrong item. To combat this you can change indentation through a dialog box.
- Click in the paragraph you need to change.
- Click on the tiny arrow to the right of the word Paragraph on the Home tab.
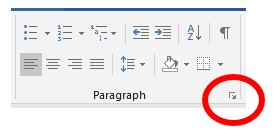
This dialog box opens up to you.

The second section of this box holds the Indentation settings.
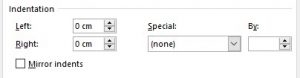
Here you have the Left indent settings, the Right indent settings and then the Special which is for First line, Hanging or No indents. Then you have by how far you require box.
Once you’ve set all or some of these select the OK button and your paragraph will be set.
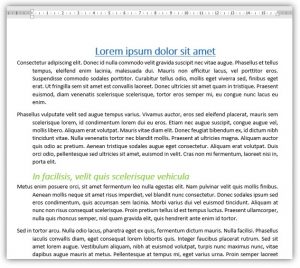
The style for text today is to have the left and the right-hand sides of blocks of text straight which is “Justified alignment”. Saying that indenting from the left and right might give the special accent needed to bring the text into focus.
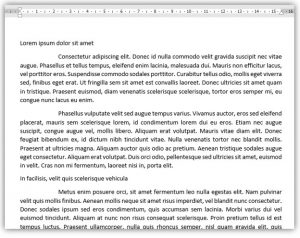
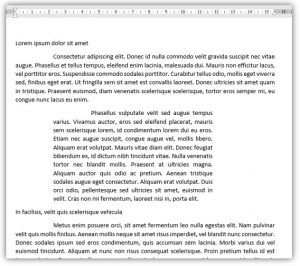
Here are examples of indentation.


WhenI press TAB a new line appears; in the middle of this line appears a horizontal arrow. How can I remove the arrow and extra line?
T. Hoogsteen
Hi T Hoogsteen,
There are three tips on our site about tabs and non-printing characters. These may help you understand what you have done and how to rectify it.
The first will show you that you have revealed the non-printing characters and the horizontal arrow is the tab symbol.
The third will show you how to use tabs in list scenario.
As to the extra line, without knowing what it is you are doing and trying to achieve it is hard to explain what to do. If for instance you have typed almost to the end of a line and then pressed tab, this will create a new line for you to type in, and with revealed non-printing characters on, you will see the horizontal arrow.
https://www.enterprisetimes.co.uk/2021/05/28/how-to-reveal-non-printing-characters-in-word/
https://www.enterprisetimes.co.uk/2019/01/11/non-printing-characters/
https://www.enterprisetimes.co.uk/2016/09/09/tabs-in-ms-word/
Hope this helps you.