
This is a topic that comes up practically in every training session. There are so many of you who do not know that you can even do this. And yes I do see people in meetings trying to marry up two pieces of paper to align the information running from one to the other. Guess what the paper moves and you read off the wrong information. It’s so frustrating! Here I am going to show you how to create the headings you need on every page as well as the information running down the page to help read off the correct information from page to page. This feature is called ‘Print Titles’.
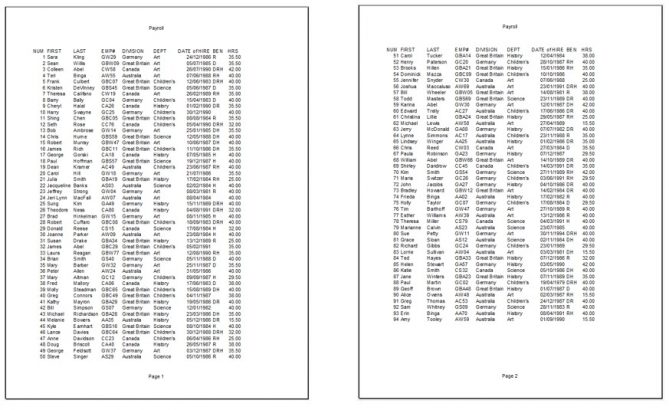
This feature needs to be activated whilst you are still in the document and not in print preview. As you cannot select rows or columns when in print preview. Let’s start with a large sheet of data that will not fit onto one page. This example is shown in Page Break Preview to show you that it doesn’t fit onto one page and how many pages this sheet will need to be printed on.
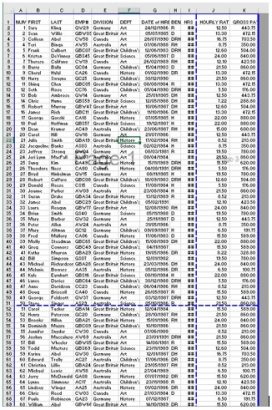
What it also shows is that on page three, which is to the right of page one, you will not be able to know who earns how much.
In this diagram I am emphasising that important information is missing. Page 1 looks great, but the others do not.
How to set to Print Titles
-
-
- Select the Page Layout tab
-

Print Titles is found almost in the centre of this ribbon.
![]()
Selecting this tool you will be presented with this dialog box.
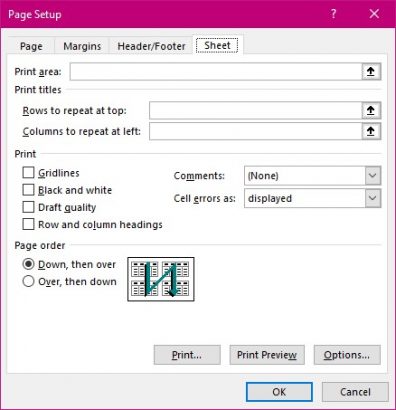
Yes you’re right it is the Page setup dialog box you see when you go into print preview. But the area at the top of this last tab ‘Sheet’ is now available for use. It is greyed out normally when you go there through print preview.
-
-
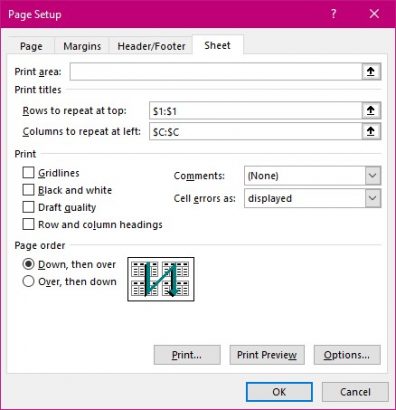
- Click inside the field named Rows to repeat at the top:
- Click on the heading row inside your spreadsheet. In this case it is the first row.
-
Excel puts the reference in as $1:$1
This means that the titles you see on page 1 will be repeated at the beginning of page 2 and the titles you see on page 3 will be repeated on page 4. The $ signs are there as Absolute References.
-
-
- Click in the next field for Columns to repeat at left:
- Select the appropriate column. In this case I have chosen last name which is column C.
-
-
-
- Select the Print Preview button found in the dialog box.
-
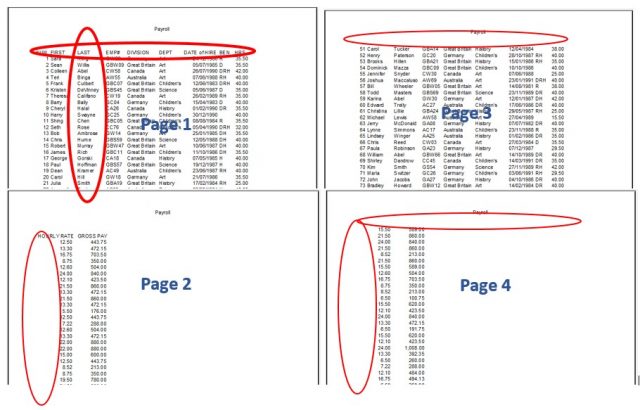
Here is the result
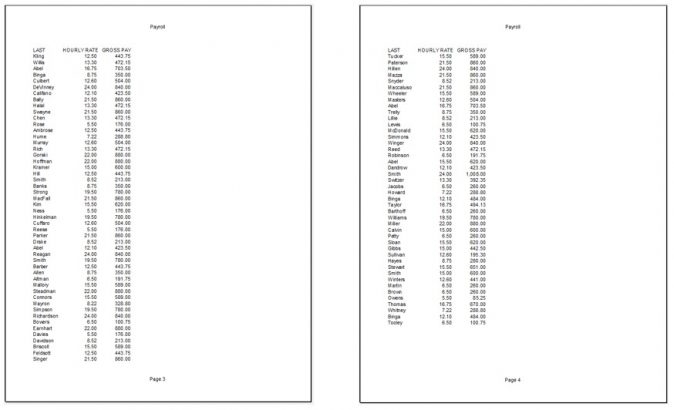
Each page has both titles at the top of each column and on the left at the start of each row. No mistakes can be made now.
You can select non contiguous columns for your repeating titles, by holding down you CTRL key as you select the columns or rows. A comma is placed between the references.

There are several benefits from understanding this feature in Excel. The first is that the documents become far easier to read. It is possible to print on multiple sheets rather than try to reduce the font size to cram onto a single page. Secondly, if planned for this reduces the amount of waste paper considerably that people produce.


