
Last week I showed you how to create columns of text in Word for a newsletter type of document. Today I shall show you how to place pictures into this text and make the ‘story’ more appealing to read. The saying is “a picture paints a thousand words” so use that to your advantage. Embellish the news with appropriate pictures.
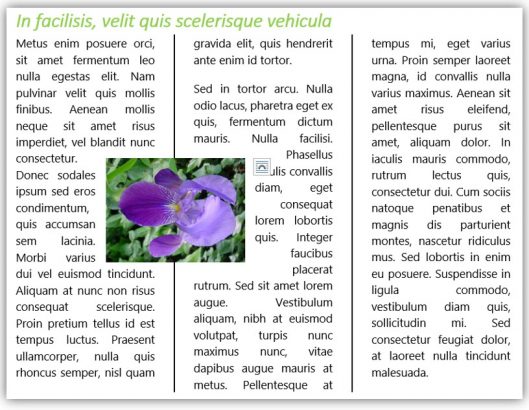
We finished the tip last time with this document.
Looks great but a picture will enhance the information held within.
Find the photos or diagrams you need to use and place them for ease of use in the same folder as the file you are working on. Please make sure that you have permission from the author of the photo or diagram to use it in your publication and when you do please also credit the image.
- Click where you roughly want your first image in the text.
- Select the Insert tab.

Select he Picture Tool, which is the fifth from the left.

- Locate the image in your folder, locate your image and select the Insert button.
Your image will be placed inside the text where your cursor is as though it is a text character.
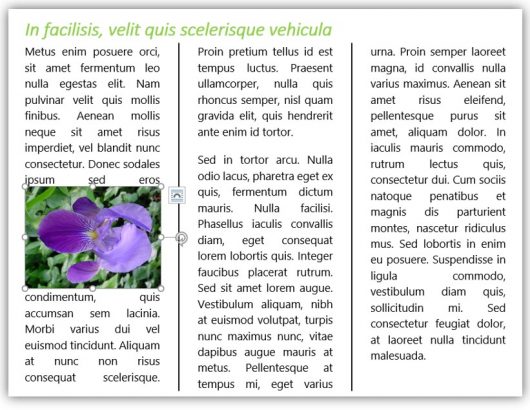
Image source – FreeImages.com /Antonio De Luz 2/5/02
Three things to notice here.
- The handles around the image. (the little circles in each corner and in the centre of each side.) These allow you to change the size of your image. It is important to scale your image to the size you need before you start to move it.
- The circular arrow. This allows you to rotate the image if you need to.
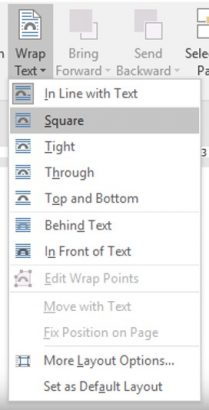
- The Wrap Text Tool which sits to the top right of my image and looks like a bridge with lined water around it. This tool will allow your picture to sit in the right place inside your text.
The Wrap Text Tool
![]()
- Select this tool. A list drops from it.
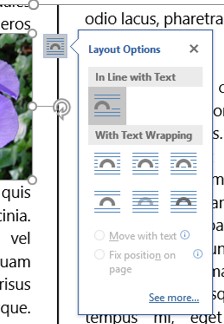
The default setting is the first one. ‘In line with Text.’ I suggest that you start with the second one ‘ Square’. This places the image with the text flowing around it squarely and evenly.
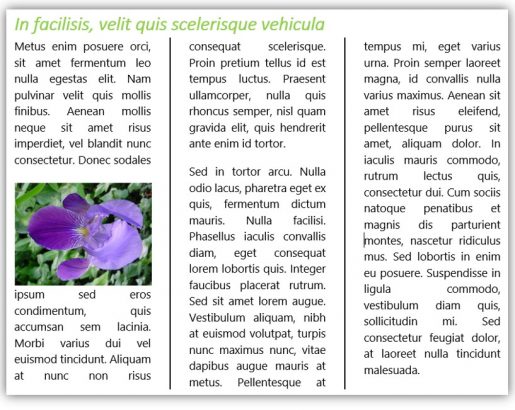
Notice that the text now flows a little differently than before. You can now move this image to a different place on the page.
- Click and hold down the left mouse button and drag it around the page and place the image where you feel it will be best placed.
As you drag, you will see the text flow around the image and this helps you chose the correct placement. I have placed my image across the two columns, sometimes this is a good idea and sometimes because of the length of words in the text and the size of the columns it looks awkward as it does here.
- Now select a different wrap effect and see if it makes the look of the text better.
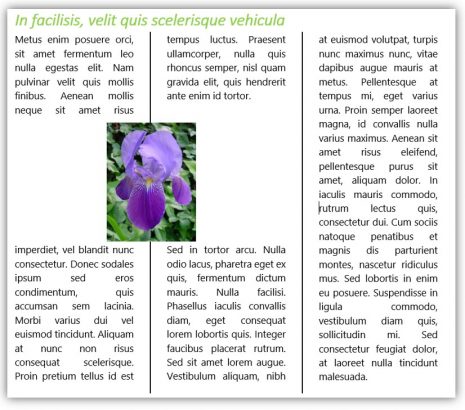
I have chosen the Top and Bottom effect. As the others made no improvements on the look. I also rotated the image to the correct orientation.
When you use these text wrap effects it is wise to re-read your text so that you know people will be able to easily follow where the continuation of your story is.
The Text Wrap Tool is also found in the Format tab of the Picture Tools Tab that appears when you have selected an image.

The list that is shown when you select the tool is this one.
When you place a high resolution image into word it is a very good idea to reduce the size of file before you place it.
Have fun with this Text Wrap tool. Next week I shall show you what to do with images that have white backgrounds.


