There are always new ways to do things every time a new version of software is launched. The most problematic part for most users is finding files that are saved in various different location not only on the machine they are using but around the network. Precious time is wasted trying to locate a file that you thought you created a while back but can’t quite remember the name or location. Well Microsoft comes to the rescue! A new feature since Office 2007 is that you can pin files to various lists so that you’re not wasting time finding them again. Theses are also called Jump lists. Eureka!
N.B. This Tip is written in Office 2016.
I am using Office 2016 on Windows 10 which does differ from Windows 7 and 8.
The first Pin List
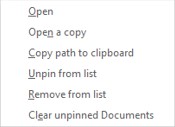
The first Pin is found on the start menu. Locate the Application you want to use and right click on it. 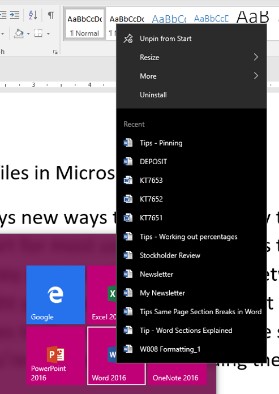
Here I have used Word and as you can see the first four items in this list are what I would call general items. I have Word Pined to the start and this is displayed as a square on the start menu. Uninstall is listed here too for ease of use. Under these four items are listed several used and saved files none of which are pinned to this list so that the more you use the bottom one will eventually fall off and disappear from view. This will NOT delete the file!
If there are several files in this list that you want to revisit at any time move your mouse to the right of the list and a slanting pin appears.
Click on the pin and it changes to a vertical pin emulating a pin securing down a piece of paper on a pin board. 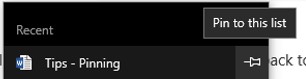

When you no longer need this to be found in this list. Click on this pin and the file will drop down to the list bellow and eventually drop from view the more files you use.
The second pin list
You can pin an application to the Task bar at the bottom of your screen.
Right mouse click on the icon and you will see the same list as in the start menu.
You don’t have to have the same files pinned in both lists so you can have different files pinned here to make your life even easier.
The third Pin list
When you open any application you are presented with this screen. 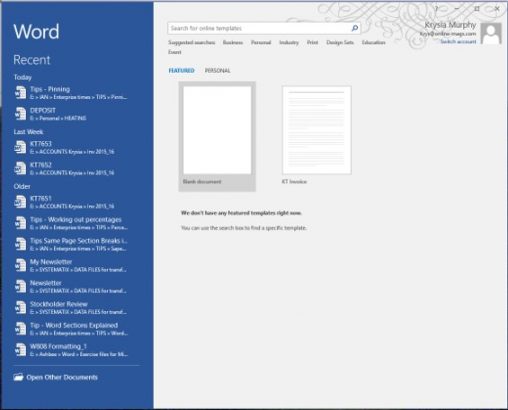
You have a list on the left of all recently used files and the ability to create a new file from templates on the right.
Move to any of the files listed here and on the right of the list click on the pin to pin that file. 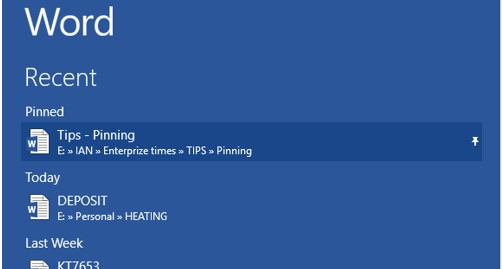
Your pinned files will now reside at the top of this list with the heading of Pinned and the rest will be segregated by date titles as shown in the image above.
You can change the way you view your application when you first load it. For instance, you might just like to load onto an empty file. This is also found in the File Options section.
The fourth pin list
When you have Windows Explorer open you can select a file and drag it to the application icon on the Task Bar and drop it there and it will be pinned to this list for you. 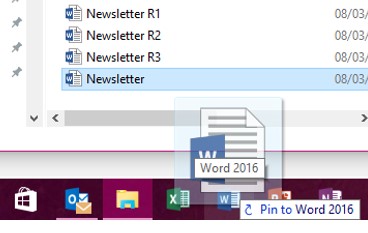
To set limits on recent files list
You can have up to 50 files listed in any of your recently used lists. You can specify how many you would like to have in the Options section of any of your applications.
Select File and then select Options towards the bottom of the list.
Select Advanced from the left hand side of the dialog box.
Move to the Display section in the right side of the Dialog box where you will find the choices. 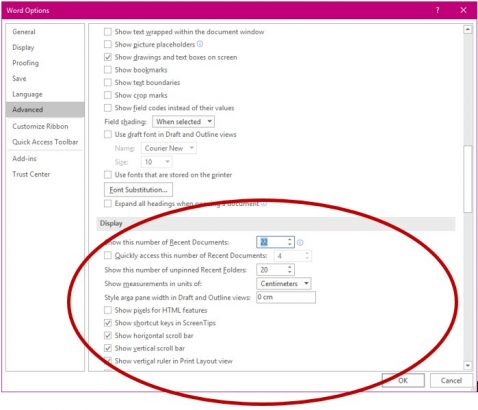
Please note that you also have the ability to pin folders.
Clearing Unpinned files
You may need to clear out the list of files that you have not pinned.
In the Open screen right mouse click on a file name. at the bottom of that list you will find “Clear unpinned files”