")
One of the most delightful features in Excel when you’re just starting out is the AutoFill feature. Have you been working hard in creating a formula that needs to be used all the way down the sheet to say line 2,000, or patiently typing out the names of the months in the correct order, or days of the week and you don’t know about AutoFill. Well please allow me to introduce you to a wonderful feature that will save you much time and give you much pleasure too.
We all know which month follows on from the month we’re in and which day follows today but typing each entry in our spreadsheets can be cumbersome and time consuming. MS Excel has been programmed to understand certain things like a name of the day or month and so understands what comes next. AutoFill is a quick copy and paste, but with enough intelligence to interpret if the item needs a straight forward paste of exactly the same thing or if it is a formula with referencing properties that needs to be used instead of the answer. (I talked about Relative and Absolute Referencing back in April so go have a look at those if you don’t know about it).
So here are a few examples of what Excel knows to fill when you use the AutoFill feature. Let’s just type in the names of the months and days and a date in a spreadsheet as shown below. Notice that the months and days are either typed in full or use only the first three letters. The date is typed using slashes between the day, month, year, or just the date and the month. 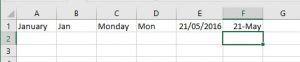
When you select a cell your mouse pointer is a big white cross, move the mouse very slightly around the cell and you will notice that it changes shape depending where it lies. 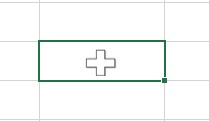
When you move to the bottom right of the selected cell you will see a small black box, hover over it and your mouse cursor changes to a thin black cross. 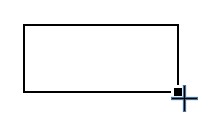
If you move just a tiny fraction up or left the mouse cursor will change once again but to another feature all together that looks like this. 
This feature allows you to move the cell contents to a new location. So not what we want here.
Find the thin black cross and hold down the left mouse button then drag down the page. You will see that the background of the cells are not filled-in with a colour as you would expect when simply selecting cells you also have a tip popping out from the mouse cursor showing you the items you are filling. 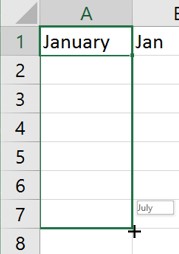
This is AutoFill. You can drag down, up, left or right BUT not at the same time. Only drag in one direction at one time. So let’s see the result of Auto filling our original sheet. 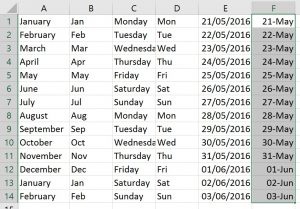
One more tip with AutoFill that will make your work quicker.
If you have data in the cells to the left or right of the column you need to fill in you can use the double click of the AutoFill to automatically fill in the series and stop at the last line of entries you have in this block. So if you have thousands of lines to fill its quick and simple to do so with a double click.
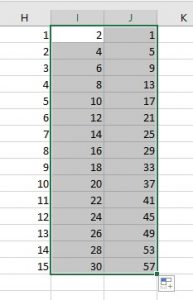
Now let’s look at the formula example. 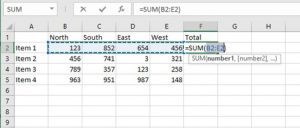
Using the AutoFill feature together with the double click, this is the result. 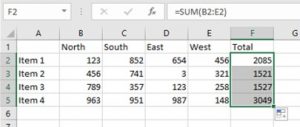
Just One more thing
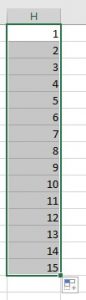
You can have pretty much anything in a series. Words with numbers work best. I have used them in the previous example having typed in the first one in A2 as Item 1 and used the AutoFill down the sheet.
If you were to type just a number on its own and tried to fill in any direction you will not get the result you were probably hoping for. So to get the fill to count by whatever means you want you need to type in two cells and then selecting BOTH cells use the AutoFill feature.